|
|
Post by Alyrenee on Dec 30, 2004 22:08:40 GMT -5
People frequently ask me how I make and use the head molds on some of my customs...so I took some pics...and hopefully some of this will help you!
Materials...
-boiling water
-tongs
-super sculpey
-blush brush
-talculm powder
-sharpie
1) Knead a chunk of sculpey until it is nice and soft. Form it into a square that is slightly larger than the face you are trying to mold. Dust the face you are molding with some powder (this prevents the clay from sticking) and then firmly press the face into the clay.
2) Now toss figure into the boiling water...
3) Remove after a minute or two using tongs. Tap on outside of the clay with your fingernail. If you leave a mark...then the clay has not cured long enough.
4) While the figure is still slightly warm, carefully pop the mold off of the face.
If a mold is too thin, then it will crack...
5) Write the character name on the back of the mold..and now you have a new negative mold to cast from!
|
|
|
|
Post by Alyrenee on Dec 30, 2004 22:30:19 GMT -5
Now...what do you do with the molds?
1) Dust the negative mold with powder.
2) Knead a small piece of clay into a ball. If they clay feels too hard, add some clay conditioner such as Sculpey Moldmaker and CLay Conditioner. Only use a small amount. This will make the clay more pliable and more easily go into the tiny face cracks.
3) Firmly jam ball into the negative mold.
4) Throw mold into boiling water for a minute and remove with tongs.
5) Before the mold completely cools, carefully remove the face (positive) from the mold (negative). Don't mash your finger on the face...it will most likely still be soft.
6) Some of the features don't always come out the best. Since the face is still soft, you can go in and carefully resculpt the features using your scultping tools. This is also a good time to remove any of the hair on that is on the mold if you plan to change the style. But you can also save that for later and carefully sand it off after the face is totally set.
7) Throw face back in water for a final set.
8) Now you have a face....but only half of a head...so you will need to take some more clay and form the back of the head onto the mold. You will also need to affix the head to the body, Generally the clay sticks pretty well to the figures...but occasionally a little glue will help. I usually try to sculpt the body and cure it first, before adding the hair and face (then you don't have to worry about messing things up). Repeated boilings won't harm your custom.
9) If the mold is too large to fit on a body due to the neck peg, you can always go back and hand drill holes in the mold. Once you finish sculpting the hair, you can either out the whole figure back in the boiling water, or just hold the head under the water until it is set.
10) Check over the final cured sculpt for any rough spots that could use a scraping wiht your sculpting tools or a sanding (i use manicure files to get at small areas)...and then you are ready to paint.
Making molds is tricky...it will take a couple of tries. They will never look as good as the orginal figure...but something is better than nothing. I have had good luck making molds from the ornaments as well. Certain figures work better than others. Any character with a strong jawline or a tricky feature won't work. Xander's chin and jaw, for example, creates a strong undercut that will mess up your molds. Lorne is also not good. I have had success with Buffy, Angel from Buffy, Willow, Anya, Critical Mass, Fox Mulder, Cyclops, Cordelia from buffy, and Cordy from Angel. Darla has a very thin nose, so you take a mold of her, be prepared to resculpt a new nose on the positive as it will come out totally smoshy.
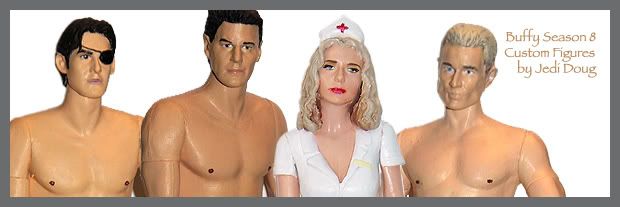
Fox examples...see my website. Gunn started out as a Fox Mulder head mold, Lindsay was Cyclops, and both Fred and Illyria were from Anya molds. Also, my Prom Buffy is made from a head mold.
|
|
|
|
Post by ba|1 on Dec 31, 2004 1:08:49 GMT -5
God save you for this thread ! Thanx Aly !  |
|
|
|
Post by Willfan on Dec 31, 2004 1:10:50 GMT -5
Thanks alyrenee! Even as an experienced customizer myself (I hope), it always takes like 5 tries to get a good face from a mold...I've never actually tried boiling the mold with the clay in it, so that may be a good idea. I have molds for Buffy II, Willow 1, and Eowyn from LotR, and they all work really well.
|
|
|
|
Post by MsBig on Dec 31, 2004 9:20:09 GMT -5
This is great! I've put a pin in it so that it doesn't disappear down the thread.
Aly, would you mind modifying the title of the first post to be 'Customising for Dummies - Head Molds'?
|
|
|
|
Post by Alyrenee on Dec 31, 2004 14:28:50 GMT -5
wish granted
|
|
|
|
Post by JDjnr on Dec 31, 2004 15:57:34 GMT -5
That's a great help and really understandable, one time i was looking though a mold guide and it was way too confusing
|
|
|
|
Post by henz on Apr 9, 2007 5:34:23 GMT -5
So wait... does boiling water cure super sculpey? (n00b - been using an oven)
Can I do this molding process if I'm casting from a sculpey head?
|
|
|
|
Post by Jedi Doug on Apr 9, 2007 9:05:44 GMT -5
So wait... does boiling water cure super sculpey? (n00b - been using an oven) You can use boiling water (or even a hot hair-dryer) to cure Sculpey. It's the process most customizers use to harden it when Sculpey has ben sculpted over an existing plastic piece. |
|